
Build your first AI phone agent (dashboard)
Build your first AI phone agent in the Trillet dashboard: create a call flow, write the prompt, test it, assign a phone number, place calls and add transfers.
This guide walks you through building your first AI phone agent in the Trillet dashboard. You will create a call flow, write and test the prompt, assign a phone number, place single and batch calls, and set up transfers to your team. If you would rather build with code, see the REST API reference or build from an AI assistant over MCP.
Getting Started
Once you sign in, you'll land on your dashboard. The sidebar on the left is always visible and groups the app into sections:
- BUILD: Assistant, Call Flows, Message Flows, Crews, Workflows, Knowledge Base
- DEPLOY: Phone Numbers, Calls (Single Call, Batch Calls, Call Queues)
- MONITOR: Call History, Conversations, Analytics and more
- ACCOUNT: Billing and Settings
Some items only appear on certain plans. To build an AI phone agent, start with a call flow: in the sidebar, click Call Flows. (Text agents for SMS and chat live under Message Flows.)
Understanding Call Flows
A call flow is the backbone of your AI agent. It holds the agent's instructions, voice, language model, greeting, tools and call settings, and it decides whether the agent makes calls, answers them, or both. You can think of it like a blueprint for your agent's calls.
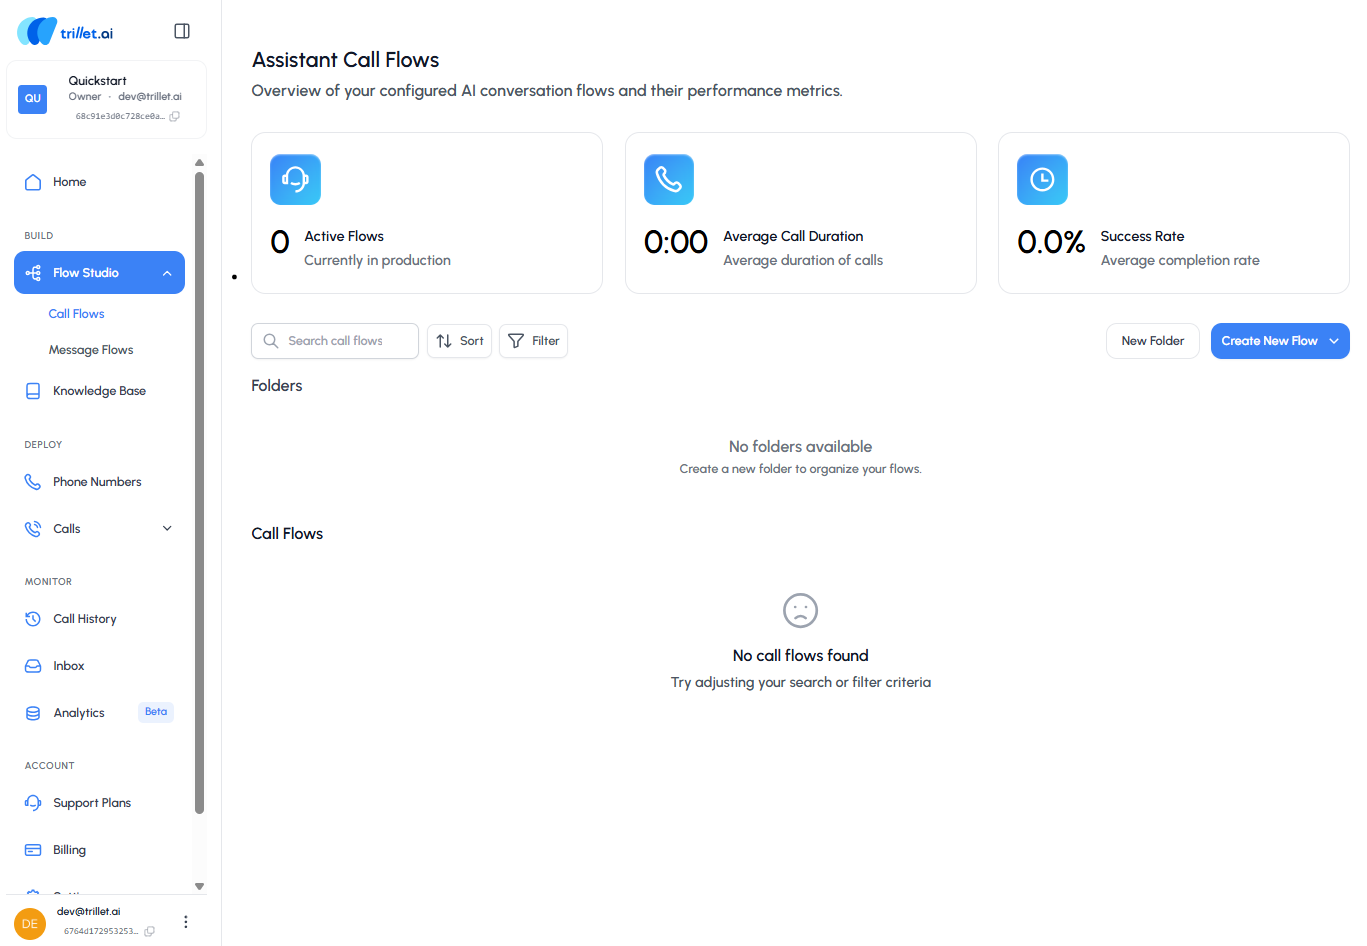

- Your call flows are listed on this page for quick access
- You can group them into folders to keep your work organized
To begin building your first flow, click New Call Flow.
1.1 Create a Call Flow
New Call Flow opens a short wizard that asks, "What agent would you like to build today?" You have three ways to start:
- Start from a template (recommended). Templates are grouped into agents that answer incoming calls and agents that make outgoing calls, for example a receptionist or a booking agent. Picking one moves you straight to the next step.
- Start from scratch. Skips the wizard and opens an empty call flow editor where you write the prompt yourself.
- Advanced (Alpha, where available). Builds a node flow for multi-step logic, parallel API calls and custom code.
If you pick a template, the wizard has two more steps:
- Business: "Whose calls will it handle?" Enter the business's website and Trillet reads it, or type the details in yourself if there's no website.
- Capabilities: "What should it handle?" Tick what the agent should do on a call, such as answering questions, booking appointments or transferring to a human. Then click Create agent.
Trillet generates the agent and opens it in the call flow editor.
The direction you pick in the wizard can be changed later. In the editor, open Settings > Greeting & Conversation > Call direction and choose inbound, outbound or both.
1.2 Prompting Your Agent
The call flow editor has three parts:
- Agent Instructions on the left: the prompt the agent follows. Its toolbar holds the language model picker, the voice picker (voice, language, speaking speed and a fallback voice), Variables and Prompt history.
- Settings and Tools in the middle: greeting, call handling, phone line, knowledge base, transfers, webhooks and the rest of the flow's settings.
- Test on the right: try the agent before it goes live.
The way you prompt your agent determines how well it performs during conversations. Think of it like giving instructions to a teammate before they step into a meeting: the clearer and more specific you are, the better they'll handle the interaction.
You can also choose how your agent starts the call under Settings > Greeting & Conversation: let the caller speak first, or have the agent open with a greeting. The same page sets the agent's name, the greeting delay and whether callers can interrupt the greeting.
Writing Effective Prompts
A strong prompt usually includes:
- A clear goal → what is the agent trying to achieve on this call?
- Background context → who is the agent, and what key details should they know?
- Conversation flow → the step-by-step path the agent should follow to reach the goal
Example Prompt Structure: If your agent's goal is to qualify leads for a demo, your prompt might:
- Set the goal as confirming interest and booking a demo slot
- Provide background context like "You are Alex, a friendly sales assistant from Acme Software"
- Outline a conversation flow where the agent greets the lead, confirms their availability, and suggests two demo times
If you started from a template, the generated prompt already follows this structure. Edit it to fit your business.
Testing Your Agent
Use the Test panel on the right of the editor, headed Try your agent:
- Start test call runs the agent in a voice call in your browser, so you can hear how it sounds.
- Test by text instead lets you chat with the agent and review its replies in writing.
The test runs your draft, including changes you haven't published yet.
It's always a good idea to test your prompt with different variations to see what gives you the most natural results.
Publishing Your Changes
Edits in the call flow editor save automatically to a draft. Live callers, your phone numbers and your website widget keep using the published version until you click Publish Changes in the editor's header. Publish whenever you're happy with a change, and before you assign a phone number or place real calls. The header also has Version history and Discard draft if you want to go back.
1.3 Assigning a Phone Number
When you're ready to take your AI agent live, it needs a phone number that people can call. Assigning a number connects your agent to the outside world, so it can handle real conversations instead of just test runs.
In the sidebar, click Phone Numbers.
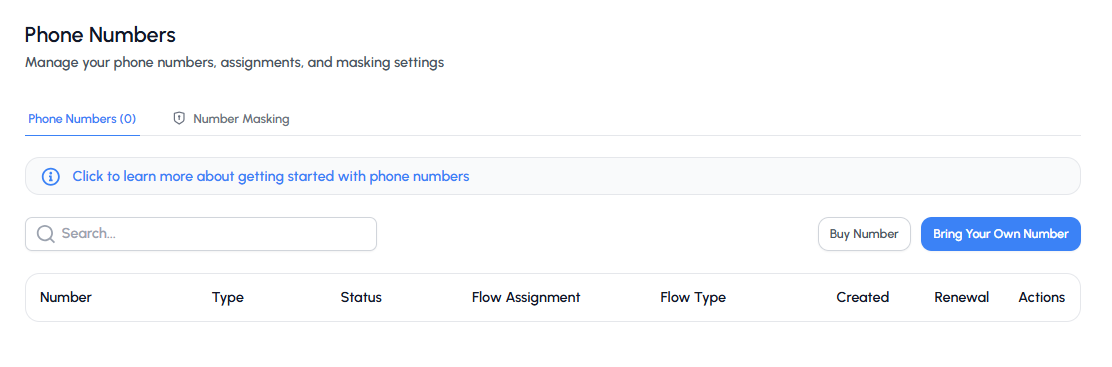

Number Options
The Phone Numbers page gives you three ways to get a number:
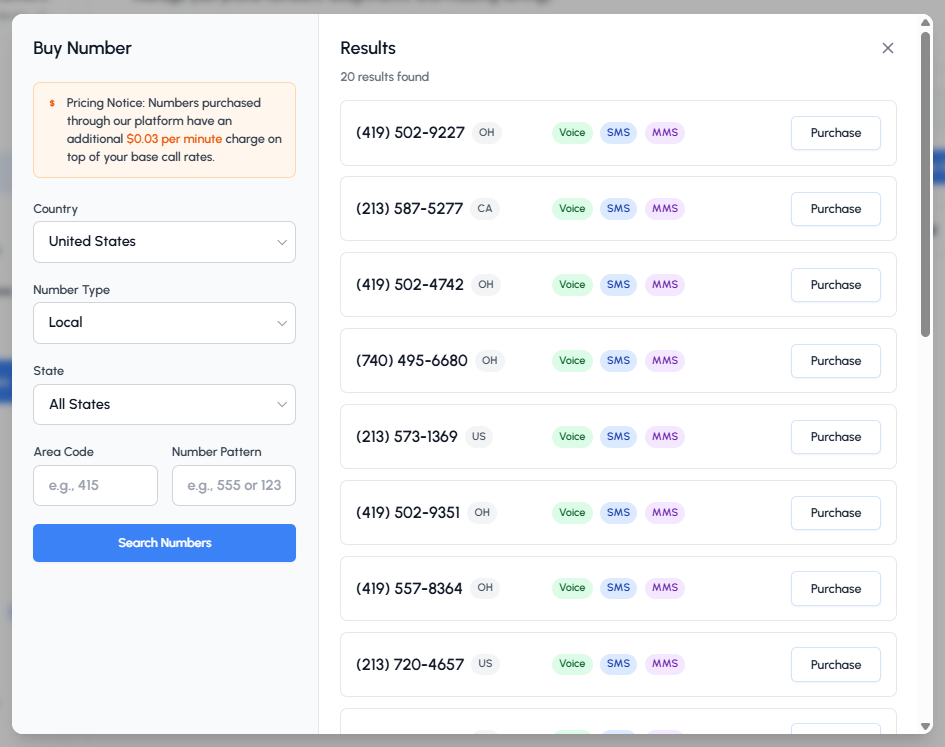
1. Buy a Number
- Purchase directly through the platform
- Search by country, number type, and area code or region where available

2. Connect WhatsApp
- Connect a WhatsApp Business number so the agent can take WhatsApp calls
- Transfers aren't available on WhatsApp calls yet
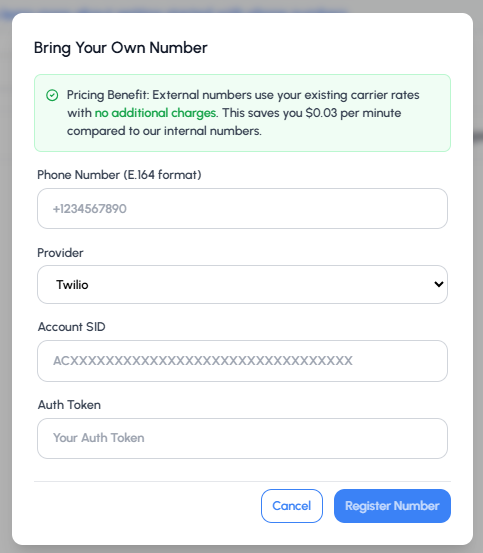
3. Bring Your Own
- Link an existing number from a provider such as Twilio, Telnyx or your own SIP trunk
- Keep using your existing carrier rates
- Manage everything from within Trillet
SIP header mappings (Twilio): on a Bring Your Own Twilio number, including numbers you already added, you can map incoming SIP headers to variables. Set the mappings on the number in the dashboard. On inbound calls the values show up as headerVariables on the call record (see Get a Specific Call History). The post-call webhook sends them as header_variables, plus twilio_call_sid.

Number Assignment
Once you have a number, open its settings from the Phone Numbers list to assign it:
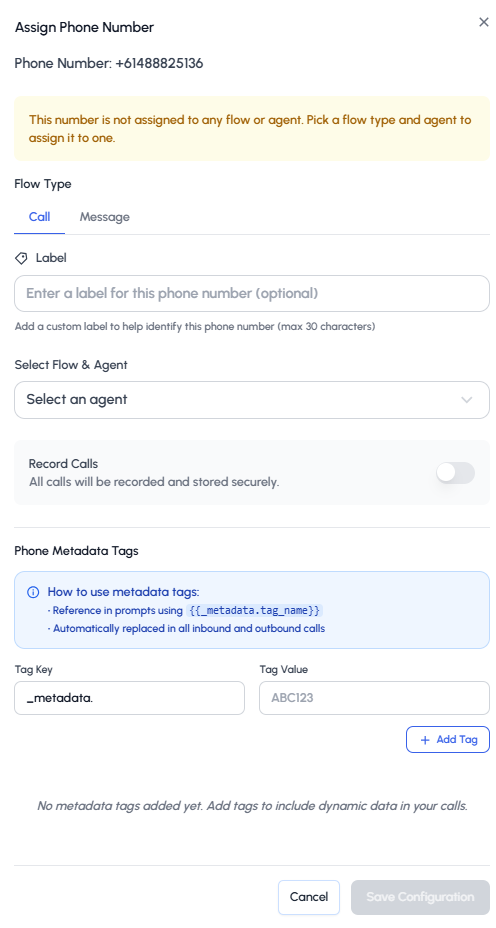

Configuration options include:
- What should this number do?: handle calls or handle messages
- Choose an AI Agent: the agent (call flow) the number connects to
- A label for the number, such as "Sales Line"
- Call recording and business hours for this number
- Custom tags (metadata) and secrets the agent can use during the call
The maximum call length is a call flow setting, not a number setting. Set it in the editor under Settings > Call Handling > Call limits > Maximum call length.
When everything is configured and your call flow is published, your number is live. Make a quick test call to confirm everything works as expected.
1.4 Sending and Receiving Calls
Once a phone number is assigned to your AI agent, it answers incoming calls (if the call flow accepts inbound calls) and can place outgoing ones.
Single Calls
To place one outbound call: in the sidebar, go to Calls > Single Call.
Under Agent, choose the agent to make the call (it needs a phone number assigned), enter the number to call under Phone Number, and click Start Call.
You can also use our Voice Calls API to programmatically initiate calls:
curl -X POST https://api.trillet.ai/v1/api/call \
  -H "x-api-key: YOUR_API_KEY" \
  -H "x-workspace-id: YOUR_WORKSPACE_ID" \
  -H "Content-Type: application/json" \
  -d '{
    "call_agent_id": "your_agent_id",
    "to": "+1234567890"
  }'
Batch Calls
Trillet also gives you the ability to place batch calls. To access this feature: in the sidebar, go to Calls > Batch Calls.
Batch Calls let you reach multiple contacts at once instead of dialing them individually. This is especially helpful for:
- Lead reactivation campaigns
- Appointment reminders
- Survey collection
- Follow-up calls
Setup Process:
- Choose the agent that will make the calls
- Click Download Template for the CSV format, then Upload Contact List with your contacts
- Start now, or schedule when the calls should go out
- Click Start Batch Call
- Track earlier batches under Past Batches
Defaults such as concurrency live in Settings > Batch Call Settings.
For large-scale operations, consider using our Batch Calls API to programmatically manage batch calls and monitor their status.
1.5 Setting up Transfers
Transfers let your agent hand a call over to a real person or another system when needed. This is useful for situations where the conversation requires human support, a specialized team, or a different department.
Transfer Setup Steps
- In the call flow editor, open Settings > Tools and click + Add
- Choose Call transfer to send the caller to a person or phone number, or Agent transfer to hand the call to another of your AI agents
- Give the transfer a Name (e.g., Support Team)
- Fill in When should the agent transfer? in plain English. Be specific: the agent reads this to decide when to transfer
- Under Transfer to, enter the destination, such as a phone number in E.164 format (
+12025550123). Warm and whisper transfers also accept other destination types, such as a SIP address, under Advanced type - Pick a Hand-off style (see below)
- Optionally set what the caller hears before the agent dials, and a Transfer greeting your team hears when they pick up
Each transfer appears as a card under Tools > Transfers. Click a card to edit it. Publish your changes to make new transfers live.
Hand-off Styles
- Cold: connects the caller straight away, with no briefing for your team
- Warm (recommended): the agent tells your team who's calling and why as it connects; the call goes through either way
- Whisper: the caller waits while the agent speaks privately with your team, who can accept or decline the call
Make sure to test your transfer destinations to ensure they're properly configured and accessible.
API Integration
Throughout this guide, we've focused on the visual interface, but every feature is also available through our comprehensive REST API:
Next Steps
Now that you've set up your first AI agent, explore these advanced features:
White-label
Trillet supports white-label for agencies and enterprises that offer AI voice agents under their own name: your own domain, branded email notifications and workspaces in your brand. Set it up under Settings.
Support & Resources
Last updated on